Many fit travelers believe their physical conditioning is a passport to high-altitude success. It is not.
- True acclimatization is a non-negotiable physiological process, not a test of toughness that can be rushed.
- Subtle, early signs of altitude sickness must be respected immediately, as they are your body’s most important warnings.
Recommendation: Adopt a mindset of ‘physiological discipline’—prioritizing hydration, pacing, and self-awareness over speed and ego.
For the active traveler, the allure of the Andes, Himalayas, or Alps is magnetic. You’ve trained for months, your cardiovascular fitness is at its peak, and you feel ready to conquer giants. There’s a common and dangerous misconception that physical strength is the primary shield against the challenges of high altitude. You receive the standard advice: “drink plenty of water,” “go slow,” and “pack warm layers.” While not incorrect, this checklist approach misses the fundamental truth of mountain travel.
The mountain does not care about your marathon time or how much you can squat. It operates on a different set of rules governed by physics and physiology. Success and, more importantly, safety in thin air are not born from brute force but from a deep understanding and respect for your body’s adaptation process. It requires what I call physiological discipline. This is a conscious, patient practice of managing your body’s resources, listening to its silent signals, and making decisions based on safety margins, not summit fever.
This guide moves beyond the generic platitudes. We will not just tell you what to do; we will explore the critical ‘why’ behind each safety principle. We will deconstruct the real risks, teach you how to build a proper acclimatization rhythm, identify the subtle warnings your body sends, and equip you to choose an operator who values your life as much as you do. This is not just about reaching the summit; it’s about returning safely, with your health and memories intact.
To navigate this crucial topic, this article is structured to build your knowledge layer by layer. Follow along to understand the science, strategy, and discipline required for a safe high-altitude expedition.
Summary: A Disciplined Approach to High-Altitude Expedition Planning
- Why Rushing to 3,000 Meters Is a Recipe for Disaster?
- How to Hydrate Effectively When Cold Air Suppresses Thirst?
- Rental Boots or Your Own: Which Is Safer for Your Feet?
- The Subtle Signs of Altitude Sickness You Must Not Ignore
- How to Plan Your “Climb High, Sleep Low” Schedule?
- Why You Can’t Be Repatriated Until You Are “Fit to Fly”?
- How to Predict Cloud Cover Specifically for Mountain Views?
- How to Choose an Outdoor Adventure Provider That Won’t Kill You?
Why Rushing to 3,000 Meters Is a Recipe for Disaster?
The first and most critical lesson the mountain teaches is humility. At sea level, your body is accustomed to an abundance of oxygen. As you ascend, this changes dramatically. At 12,000 feet (approximately 3,650 meters), you are breathing in 40% fewer oxygen molecules with every breath. This state, known as hypoxia, is the root cause of all altitude-related illnesses. Your body can and will adapt, but this process—acclimatization—is biological, not psychological. It cannot be rushed by willpower or physical fitness.
Ignoring this fundamental rule has catastrophic consequences. Rushing an ascent is the single greatest risk factor for developing severe altitude sickness. A study on Mount Kilimanjaro revealed that 76% of fatalities caused by High-altitude Pulmonary Edema (HAPE) occurred in climbers who chose itineraries lasting less than six days. They treated the mountain like a staircase to be sprinted up, and they paid the ultimate price. This is not a failure of fitness; it is a failure of patience.
Think of your body’s adaptation as an “oxygen economy.” When you ascend too quickly, you create a physiological deficit that your system cannot repay. The only “cure” for this deficit is to give your body the time it needs to produce more red blood cells and adjust its chemistry. Rushing is, in essence, bankrupting your body’s ability to function in a low-oxygen environment. This isn’t just a risk; it’s a predictable outcome.
How to Hydrate Effectively When Cold Air Suppresses Thirst?
“Drink more water” is perhaps the most common piece of high-altitude advice, yet it’s often the most poorly executed. The reason is a deceptive physiological trick: the cold, dry air at altitude suppresses your body’s thirst mechanism. You simply don’t feel thirsty, even as your body loses significant amounts of water through respiration. Every breath you exhale in the thin, cold air is saturated with moisture, leading to rapid dehydration that you don’t perceive.
This dehydration thickens your blood, making it harder for your heart to pump and deliver what little oxygen is available to your vital organs. It also exacerbates the symptoms of Acute Mountain Sickness (AMS), such as headaches and fatigue. Effective hydration is therefore a matter of strict discipline, not instinct. You must drink proactively and systematically, even when you don’t want to.
The goal is to consume 3-4 liters of fluid per day. A practical approach is to carry a 1-liter water bottle and make it your mission to finish it every few hours. Using an insulated bottle or thermos is a wise strategy. Drinking warm liquids like herbal tea or hot water with lemon not only encourages consumption but also saves your body the precious energy it would otherwise spend warming up ice-cold water. Monitoring your urine output and color is a simple, effective way to gauge your hydration status; it should be plentiful and pale yellow.

As the image suggests, water is life in the mountains. Every drop counts towards maintaining your body’s efficiency. Reduce or eliminate dehydrating substances like caffeine and alcohol, both before and during your trek. Arriving at the trailhead already well-hydrated gives you a significant head start in this crucial battle against the invisible effects of altitude.
Rental Boots or Your Own: Which Is Safer for Your Feet?
Your feet are your single most important asset on a trek. An issue as seemingly minor as a blister can become a trip-ending catastrophe at high altitude, where every step is an effort. The choice between using rental boots and investing in your own pair is therefore not a question of convenience, but of risk management and building a proper safety margin. While quality rentals can be a viable option for a first-time climber with no known foot issues, the decision requires careful consideration.
The primary advantage of your own boots is a guaranteed fit and a proper break-in period. You know their quirks, how they perform on different terrains, and that they are molded to the unique shape of your feet. This familiarity drastically reduces the risk of blisters, hot spots, and more severe foot injuries. A break-in period of at least 3-4 weeks of regular wear is non-negotiable for new boots. For frequent trekkers or anyone with sensitive feet or past issues, owning your own boots is not a luxury; it’s a mandatory piece of safety equipment.
If you opt for rentals, the responsibility is on you to be meticulous. Check the boots for structural integrity, worn-out soles, and signs of damage. Most importantly, try them on with the exact socks you plan to wear on the trek and spend as much time as possible walking in them. Ensure there is no heel lift and that your toes aren’t ramming the front on descents. The following matrix can help guide your decision, as this comparative analysis of boot choices shows.
| Frequency of Use | Foot Sensitivity | Recommendation | Risk Factors |
|---|---|---|---|
| First-time climber | No foot issues | Quality rentals acceptable | Check for structural integrity, proper fit |
| Annual trekker | Minor sensitivity | Own boots recommended | Break-in period essential (3-4 weeks) |
| Frequent climber | Known foot problems | Own boots mandatory | Custom insoles may be needed |
| Occasional use | Prone to blisters | Own boots strongly advised | Rental boots increase injury risk |
Ultimately, your boots are your interface with the mountain. Compromising on their quality or fit is a gamble that is simply not worth taking when the stakes are so high.
The Subtle Signs of Altitude Sickness You Must Not Ignore
Acute Mountain Sickness (AMS) is not a sign of weakness; it’s a normal physiological response to rapid ascent. In fact, research shows that as many as 75% of climbers experience some form of mild AMS above 10,000 feet (3,000 meters). The danger lies not in its occurrence, but in ignoring it. Fit individuals, accustomed to pushing through discomfort, are particularly at risk of dismissing the early, subtle warnings their bodies are sending. This is where physiological discipline trumps physical strength.
The classic symptom of AMS is a headache, often accompanied by nausea, fatigue, and dizziness. However, before these overt symptoms manifest, there are often more subtle clues—the “silent signals” that you must learn to recognize. These can include unusual lethargy, a loss of appetite, frequent waking during the night, or uncharacteristic irritability and social withdrawal. A teammate who suddenly becomes quiet or anti-social is a major red flag. Ignoring these signs and continuing to ascend is how mild AMS progresses to life-threatening conditions like HAPE (fluid in the lungs) or HACE (fluid on the brain).
The guiding principle is absolute: if you or a teammate feels unwell at altitude, you must assume it is AMS until proven otherwise. The only appropriate response is to stop ascending. Rest at your current altitude and see if symptoms improve. If they worsen, or if signs of severe AMS appear, immediate descent is the only effective treatment. Ataxia—a loss of coordination manifesting as a staggering, drunken walk—is a definitive sign of HACE and a medical emergency requiring urgent evacuation.
Your Action Plan: Field Tests for Detecting HACE
- Heel-to-toe walk test: Have the person walk in a straight line, placing their heel directly in front of the opposing toe with each step. An inability to do so without stumbling indicates ataxia.
- Finger-to-nose test: Ask the person to close their eyes and try to touch the tip of their nose with their index finger. Consistently missing the mark suggests a loss of coordination.
- Mental status check: Ask simple, verifiable questions about the date, their location, or basic math. Confusion or incorrect answers can signal cerebral involvement.
- Behavioral observation: Be vigilant for uncharacteristic irritability, apathy, or social withdrawal. Any significant change from a person’s baseline behavior is a serious warning.
- Lake Louise Score: If your guide is trained, they should be using the standardized Lake Louise Scoring System. A score above 7 indicates severe AMS and necessitates immediate action.
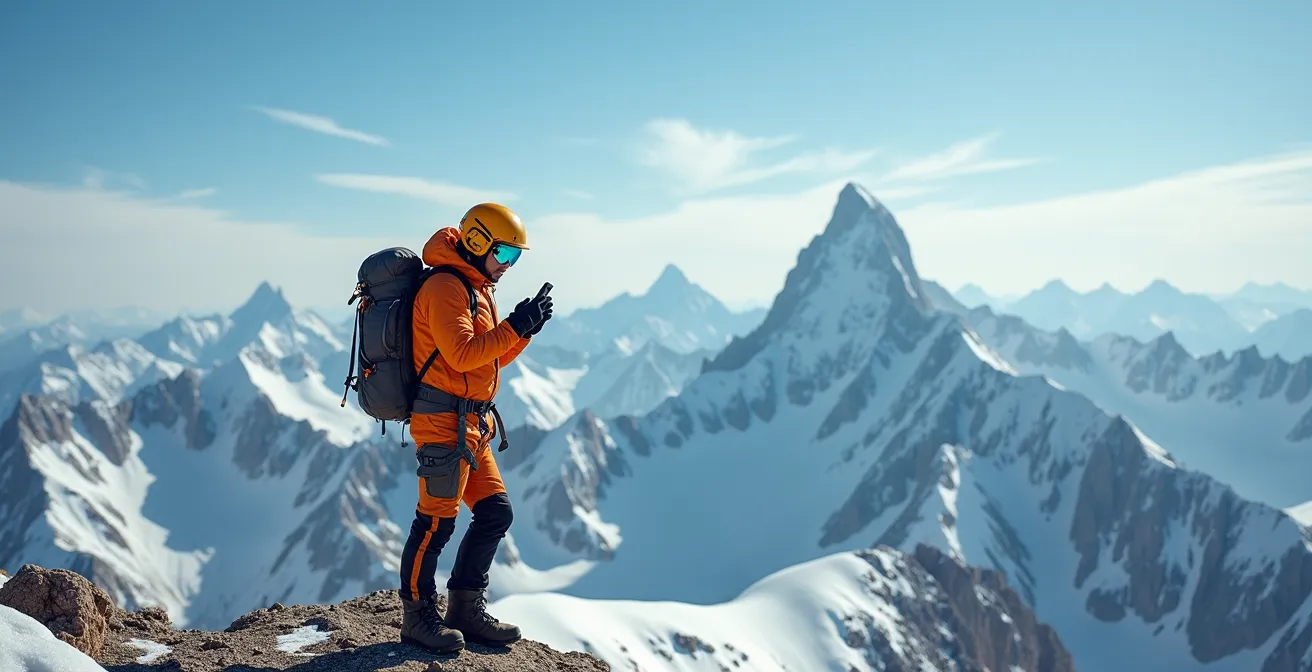
How to Plan Your “Climb High, Sleep Low” Schedule?
The mantra “climb high, sleep low” is the golden rule of acclimatization. It is the practical application of giving your body the stimulus it needs to adapt without overwhelming it. This principle involves climbing to a new, higher altitude during the day to stress your system, then descending to a lower altitude to sleep. This allows your body to recover in a more oxygen-rich environment while still benefiting from the adaptive trigger of the higher ascent. This isn’t just a catchy phrase; it’s a carefully calibrated acclimatization rhythm.
A well-designed itinerary will have this rhythm built into its structure. It avoids large jumps in sleeping altitude and incorporates necessary rest days. Once above 3,000 meters (10,000 feet), a safe protocol is to increase sleeping altitude by only 300m (about 1,000 feet) per night on average. Furthermore, it’s critical to schedule an extra acclimatization day—where you stay at the same sleeping altitude for a second night—for every 1,000 meters (3,000 feet) you gain.
On these “rest” days, you don’t stay idle in your tent. You embark on an acclimatization hike, climbing 400-500 meters higher before returning to the lower camp for the night. For example, your schedule might look like this: sleep at 3,300m (night 1), then 3,600m (night 2). On day 3, you would hike up to 4,000m and return to sleep again at 3,600m before moving your camp higher on day 4. This sawtooth profile of ascent and descent is the most effective way to build a strong foundation for higher altitudes.
As this climber demonstrates, the “climb high” portion is an active, demanding part of the day. This process maximizes physiological adaptation while minimizing the risk of exhaustion and illness. When vetting an expedition provider, scrutinize their itinerary. If it doesn’t clearly incorporate this “climb high, sleep low” rhythm with adequate rest days, it’s an immediate red flag.
Why You Can’t Be Repatriated Until You Are “Fit to Fly”?
In a medical emergency at high altitude, the instinct is to get the patient home as quickly as possible. However, the process of medical evacuation is complex, especially when it involves air travel. The term “fit to fly” is a critical gatekeeper in this process, determined by medical professionals to ensure that the act of flying does not worsen a patient’s condition. For a climber suffering from severe altitude sickness, a commercial flight can be deadly.
The cabin of a commercial aircraft is pressurized to an equivalent altitude of 6,000-8,000 feet (1,800-2,400 meters). For a healthy person, this is manageable. But for a patient with HAPE (fluid in the lungs), the lower ambient pressure can cause the fluid to expand, leading to a collapsed lung (pneumothorax). For a patient with HACE (brain swelling), the change in pressure can dangerously increase intracranial pressure. Before a patient can be cleared for a commercial flight, their condition must be stabilized at a lower altitude, often requiring hospitalization for several days.
This is why ground or helicopter evacuation to a proper medical facility at a lower altitude is the first and most critical step. As experts in mountain rescue state, a swift evacuation ensures the best chance of recovery. According to Tropic Helicopters Tanzania in their Mountain Rescue Services Report:
For climbers suffering from severe HAPE or HACE, every second counts. Helicopter evacuation eliminates the risks associated with slow descents and ensures immediate medical care.
– Tropic Helicopters Tanzania, Mountain Rescue Services Report
The decision to grant a “fit to fly” certificate involves the local treating physician, the medical team from your travel insurance provider, and airline medical officers. This process underscores the absolute necessity of comprehensive travel insurance that specifically covers high-altitude trekking and helicopter evacuation. Without it, you are not only facing a medical crisis but also a potential financial one.
How to Predict Cloud Cover Specifically for Mountain Views?
Weather in the mountains is notoriously fickle and can change in minutes. While comprehensive forecasts are essential for overall planning, predicting the localized cloud cover that can make or break a summit view requires a more nuanced, observational approach. Learning to read the mountain’s daily weather patterns is a key skill for any trekker. The goal is to identify short, predictable windows of clear visibility.
Mountain weather is often driven by a daily cycle of winds. Understanding this cycle is the first step in forecasting views. Your strategy should include the following observations:
- Morning Assessment: Mountains are typically clearest at dawn. The air is cold, stable, and has not yet been heated by the sun, which is the primary driver of cloud formation. Plan to be in position for key views early in the day.
- Identify Anabatic Winds: As the sun heats the slopes in the morning, it creates upslope winds known as anabatic winds. These winds carry moisture up from the valleys, which condenses into clouds as it cools at higher elevations. If you see these clouds building by mid-morning, your window for clear views is closing.
- Recognize Katabatic Patterns: In the evening, the process reverses. Slopes cool down, and the dense, cold air flows downslope. These katabatic winds often push clouds out of the high valleys, creating a second window of clear visibility around sunset.
- Monitor Lenticular Clouds: Keep an eye out for stationary, lens-shaped clouds forming over peaks. These lenticular clouds are a tell-tale sign of very strong high-altitude winds and often indicate that a significant weather system is approaching within the next 24 hours.
The most important rule is to operate within a 3-hour window strategy. Mountain forecasts are rarely reliable beyond a few hours. Use the forecast to plan your day, but use your own observations of wind and cloud patterns to make tactical decisions about when to push for a viewpoint. This active engagement with your environment is far more effective than blindly following a schedule.
Key Takeaways
- Physiological Discipline: Your success depends more on patient self-management (pacing, hydration) than on raw physical fitness.
- Acclimatization is a non-negotiable biological process; the “climb high, sleep low” rhythm is mandatory for safe ascent.
- Vetting your guide and operator on their safety protocols, guide-to-client ratio, and emergency oxygen supply is the most critical decision you will make.
How to Choose an Outdoor Adventure Provider That Won’t Kill You?
After all your personal preparation, the single most important safety factor on your expedition is the guide and operator you choose. A reputable provider is your primary safety margin. They are the ones with the training to recognize early signs of AMS, the experience to manage a crisis, and the logistical network to execute an evacuation. Choosing an operator based solely on the lowest price is the most dangerous form of gambling.
Your vetting process must be thorough and uncompromising. You are not just a client; you are entrusting this company with your life. You have the right and the responsibility to ask hard questions and expect transparent, confident answers. A professional operator will welcome this scrutiny. A budget operator who cuts corners on safety will often be evasive or defensive. Your goal is to ascertain their commitment to safety over summit success rates.
Before booking any expedition, you must get clear answers to the following critical questions:
- What is your specific protocol for a suspected case of HACE or HAPE? (Listen for immediate descent, use of oxygen, and evacuation procedures).
- What is your guide-to-client ratio, especially on summit day? (Lower is better, e.g., 1:2 or 1:3).
- How many liters of emergency oxygen do you carry per group, and are your guides trained in its administration?
- Are your lead guides certified as Wilderness First Responders (WFR) or an equivalent advanced medical certification?
- Can you provide details on the experience level of the specific guide who will lead our expedition?
- Do you have standing arrangements with helicopter evacuation services, and do you require proof of our evacuation insurance?
- How do you monitor client health daily? (They should mention pulse oximeters and systematic symptom checks like the Lake Louise questionnaire).
An operator’s investment in guide training, emergency equipment, and robust protocols is the best indicator of their professionalism. Choosing a qualified guide is not an expense; it is the most vital piece of safety equipment you can have.
Your mountain adventure begins not at the trailhead, but with the discipline and rigor you cultivate today. Begin your preparation now by assessing every aspect of your plan—from your gear to your guide—with the gravity it deserves. This disciplined approach is your true path to a safe and successful expedition.
Frequently Asked Questions About High-Altitude Safety
What medical conditions prevent immediate air evacuation?
HAPE patients risk pneumothorax (collapsed lung) and HACE patients face increased brain swelling due to cabin pressure changes during flight. These conditions must be stabilized before air transport.
Who determines if a patient is ‘fit to fly’?
The decision involves the local treating physician, the insurance company’s medical team, and airline medical officers. A formal ‘Fit to Fly’ certificate is typically required after a stabilization period.
What alternatives exist to commercial flights for evacuation?
Specialized medical flights with sea-level pressurized cabins are available but expensive. Coverage depends on travel insurance tier – many basic policies exclude high-altitude rescue.