The safety of your adventure doesn’t lie in a provider’s license, but in your ability to spot systemic failures before they become fatal flaws.
- Vetting a provider means probing their safety culture, not just checking for a certificate.
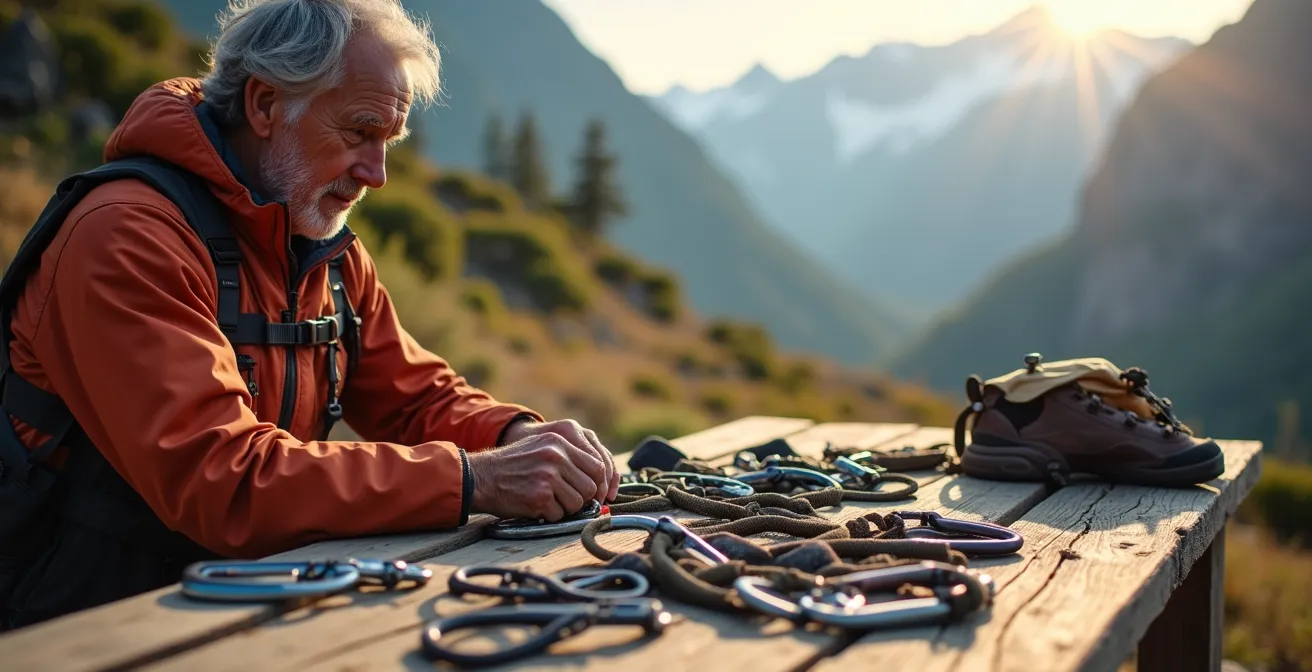
- Personal equipment inspection is a non-negotiable skill; never trust rental gear blindly.
- Your travel insurance policy likely contains specific “hazardous activity” clauses designed to void your coverage when you need it most.
Recommendation: Adopt a safety inspector’s critical mindset for every decision, from booking your trip to the final check of your harness.
The promise of adventure travel is intoxicating: rappelling down a cascading waterfall, exploring a sunken wreck, or paragliding over an alien landscape. For thrill-seekers, these moments are what make life worth living. But a nagging question always lingers in the back of the mind: is the person I’m trusting with my life truly competent, or just good at marketing? The standard advice—”check for licenses,” “read reviews”—is dangerously superficial. It creates a false sense of security in an industry where standards can vary dramatically from one valley to the next.
The uncomfortable truth is that many adventure-related incidents are not freak accidents but the predictable result of systemic failures. These failures hide in plain sight: in the worn-out gear, the rushed safety briefing, the guide’s dismissive attitude. An official certificate on the wall means nothing if the underlying safety culture is rotten. The real challenge isn’t finding a “certified” provider; it’s learning to see what’s really there, to distinguish between genuine competence and mere compliance.
This guide abandons the conventional checklist. Instead, it equips you with an inspector’s mindset. It will teach you how to analyze a provider’s entire safety system, from their booking process to their emergency plans. We will dissect the subtle red flags that most tourists miss, probe the fine print of insurance policies that can leave you stranded, and detail the hands-on gear checks you must perform yourself. This is not about avoiding risk—it’s about understanding and managing it, so your next adventure is memorable for all the right reasons.
This in-depth analysis will guide you through the critical checkpoints of selecting a safe adventure provider. You will learn to evaluate everything from certifications and staff to equipment and insurance, ensuring you are prepared for any eventuality.
Summary: How to Choose an Outdoor Adventure Provider: An Inspector’s Guide to Not Getting Killed
- Why “Licensed” Doesn’t Always Mean “Safe” in Adventure Tourism?
- How to Train for Canyoning if You Live in a Flat City?
- Pre-book or Walk-in: Which Gets You the Best Instructors?
- The Insurance Clause That Voids Your Coverage for Adventure Sports
- How to Check Your Rental Harness/Helmet for Wear and Tear?
- How to Ensure Your Chronic Condition Is Covered for Evacuation?
- The Power Bank Mistake That Leaves You Stranded on a Hike
- How to Get Scuba Certified Abroad Without Compromising Safety?
Why “Licensed” Doesn’t Always Mean “Safe” in Adventure Tourism?
The most common piece of advice is also the most misleading: “choose a licensed provider.” A license is merely a baseline, often indicating little more than the payment of a fee and minimal regulatory compliance. It is not a guarantee of competence, sound judgment, or a robust safety culture. The critical distinction is between compliance and competence. A provider can be 100% compliant with local regulations yet dangerously incompetent in practice. This is because the majority of incidents are not caused by a lack of a license.
In fact, PADI certification data reveals that 70% of diving incidents stem from diver error or a lack of proper training—the human factor. A license on the wall cannot prevent a guide’s complacency or a client’s overconfidence. A true safety inspector looks beyond the paperwork for evidence of a systemic approach to managing this human risk. This is where you must learn to spot the unspoken red flags that reveal a provider’s true attitude toward safety.
Industry Benchmark: The ISO 21101 Standard
To understand what a serious safety system looks like, consider the ISO 21101:2014 standard for adventure tourism. This isn’t a simple business license; it’s a comprehensive framework for a Safety Management System. It requires providers to demonstrate leadership commitment, conduct formal risk assessments for all activities, develop and practice emergency response plans, provide extensive staff training, and maintain meticulous documentation. While few small operators will be ISO-certified, asking if they follow a similar documented safety management system (and if you can see it) separates the professionals from the cowboys.
A weak safety culture manifests in subtle ways. Look for guides who don’t wear the proper safety equipment during demonstrations, who rush through safety briefings without checking for understanding, or who adopt a dismissive attitude when clients express concerns. How is equipment stored? Is it organized and clean, or thrown carelessly in a pile? A lack of clear, posted emergency procedures is another major warning sign. These cultural indicators are far more telling than any certificate.
How to Train for Canyoning if You Live in a Flat City?
Physical preparedness is a fundamental, and often overlooked, component of adventure safety. Arriving for a demanding activity like canyoning without specific conditioning not only diminishes your enjoyment but also elevates your risk of injury, turning you into a liability for the entire group. For urban dwellers far from mountains, the challenge is to replicate the unique physical stresses of canyoning—steep descents, cold water shock, and grip-intensive movements—using the environment you have.
The key is creative, functional training that mimics the demands of the sport. You don’t need a canyon; you need to simulate its forces. This involves building eccentric leg strength for braking on descents, developing grip endurance for rope work, and conditioning your body to handle sudden temperature changes. Your city is a gym if you know how to use it.

As the image demonstrates, even a simple concrete stairwell can become a powerful training tool. Beyond this, there are numerous ways to prepare your body without leaving the city limits. Focus on these key areas:
- Leg Endurance: Use parking garage ramps for repeated weighted descents (wearing a heavy backpack) to build the specific quad endurance needed for long rappels.
- Grip Strength: Practice dead hangs on playground monkey bars or pull-up bars to failure. This is essential for managing ropes and maintaining control.
- Cold Acclimatization: Take controlled cold showers, gradually increasing the duration, to prepare your body and mind for the inevitable shock of cold canyon water.
- Stability and Flexibility: Perform ankle stability exercises on uneven surfaces (like a couch cushion) and train hip flexibility with movements that mimic scrambling over rocks.
This type of specific preparation ensures that your body is an asset, not a liability, when you finally step into the canyon. A physically prepared client is a safer client, better able to assist themselves and others if a situation deteriorates.
Pre-book or Walk-in: Which Gets You the Best Instructors?
The decision to pre-book an adventure or arrange it as a walk-in client has significant implications for the quality of instruction and safety you receive. It’s a trade-off between securing a spot and having the ability to perform on-the-ground due diligence. Neither strategy is foolproof, but understanding the operational dynamics of adventure providers allows you to tilt the odds in your favor.
Pre-booking, especially with a specific, highly-recommended instructor, often secures you the “A-Team.” Senior guides are typically assigned to advance reservations. However, this commits you sight-unseen; you cannot physically inspect the equipment or gauge the operation’s safety culture before paying. Walk-ins have the opposite advantage: you can look the guide in the eye, check the gear firsthand, and walk away if you see red flags. The risk is that during high season, you may be assigned a junior guide or find that all the reputable operators are fully booked. As analysis from Princeton’s Outdoor Action program shows, the approach to safety management differs greatly between programs for beginners and those for experienced individuals, and the guide you get determines that approach.
A comparative analysis reveals the strategic considerations for each option.
| Factor | Pre-booking | Walk-in |
|---|---|---|
| Guide Experience Level | Senior guides (A-Team) often assigned | May get junior staff in high season |
| Equipment Inspection | Cannot verify beforehand | Can physically inspect before payment |
| Price Flexibility | Fixed rates | Potential for negotiation |
| Best Strategy | Request specific instructor, book shoulder season | Visit early morning before crowds |
The optimal strategy often involves a hybrid approach. Do your research to identify top guides or companies, then attempt to book with a specific, named instructor. If that’s not possible, plan to arrive in the shoulder season when even walk-ins have a better chance of getting experienced staff. If you must travel in high season and walk-in, visit operators first thing in the morning before the crowds arrive to have a better selection of guides and more time for a thorough inspection.
“Programs that are introducing new people to outdoor activities versus programs that are providing activities for experienced outdoorspersons require different safety management approaches.”
– Princeton Outdoor Action, Outdoor Action Guide to Developing a Safety Management Program
The Insurance Clause That Voids Your Coverage for Adventure Sports
Your standard travel insurance is not your friend in the world of adventure sports. It is a contract filled with carefully worded exclusions designed to limit the insurer’s liability precisely when you are most at risk. Assuming you are covered for a climbing fall or a diving incident is a catastrophic financial mistake. A simple injury can quickly escalate, and it’s critical to know that remote location evacuations can exceed $100,000—a cost you will bear entirely if your policy has been voided.
The only way to confirm coverage is to read the policy’s Product Disclosure Statement (PDS) with the critical eye of a lawyer. Pay no attention to the marketing brochures; the truth lies in the fine print of the exclusion clauses. Your mission is to actively search for keywords that insurers use to deny claims related to adventure activities. Do not wait for an emergency to discover you are uninsured.
Before purchasing any policy, use the “find” function (Ctrl+F or Cmd+F) on the PDF document to hunt for these specific terms. Your findings will determine whether the policy is suitable or worthless. Treat this as a non-negotiable step in your pre-trip planning.
- ‘Hazardous activities’ or ‘Extreme sports’: This is the most important clause. It will either list specific sports that are excluded (e.g., mountaineering, kitesurfing, rafting above a certain grade) or provide a general definition that could be interpreted broadly.
- ‘Altitude limit’: Many policies void coverage for any activity conducted above a certain altitude, typically between 2,500 and 4,000 meters. This is critical for trekkers and climbers.
- ‘Depth limit’: For scuba divers, coverage is almost always limited to a specific depth, usually 30 or 40 meters, and often requires you to be certified for that depth.
- ‘Unlicensed vendor’: This is a crucial trap. Many policies state that coverage is void if the activity is conducted with a provider that is not “licensed” by the appropriate local authority. In countries with lax regulation, this can be an easy way for insurers to deny a claim.
If a sport is excluded, you must purchase a specialized add-on or a dedicated extreme sports insurance policy. There is no middle ground. Being underinsured during high-risk activities is functionally the same as being uninsured.
How to Check Your Rental Harness/Helmet for Wear and Tear?
Never outsource your safety. Even with the most reputable provider, the final line of defense is your own hands-on inspection of the life-saving equipment you are about to use. Rental gear, by its nature, endures significant use and abuse. While a good operator will have a retirement schedule for their equipment, you must operate under the assumption that a worn-out piece may have slipped through the cracks. A five-minute personal inspection is a non-negotiable ritual.
This isn’t about a casual glance; it’s about a tactile, forensic examination. You need to know what to look for, feel for, and listen for. For soft goods like harnesses, focus on changes in texture and color. For hard goods like helmets and carabiners, look for cracks and listen for mechanical integrity. Your senses are your most important inspection tools.

This macro view of harness webbing shows what you need to be looking for: the subtle signs of material fatigue. Your inspection must be just as detailed. Follow this checklist before accepting any piece of rental gear:
- Harness Webbing: Don’t just look at it. Pinch and roll the webbing between your fingers, especially around the belay loop and tie-in points. Feel for soft spots, inconsistencies, or a “fuzzy” texture, which indicate internal wear and loss of structural integrity.
- Helmet Age & Integrity: Find the manufacturing date stamp, often a dial icon with a month/year. Most manufacturers recommend retiring helmets after 5-10 years, regardless of use, as the plastic becomes brittle. Inspect the entire shell for cracks, dents, or sun-fading, paying close attention to the areas around attachment points for headlamps or cameras.
- Carabiner Gate: The gate is the most common failure point. Listen to it. It should snap shut with a crisp, sharp click. A sluggish, weak, or silent snap is a major red flag indicating a worn spring.
- Carabiner Mechanism: For locking carabiners, feel the spring mechanism. It should be smooth and engage positively. Feel for any play, grit, or stickiness in the screw gate or auto-locking mechanism.
If any piece of equipment fails these checks, reject it immediately and request a replacement. Do not be shy or apologetic. It’s your life, not their feelings, that is the priority.
How to Ensure Your Chronic Condition Is Covered for Evacuation?
Participating in adventure travel with a chronic medical condition (such as asthma, diabetes, or a heart condition) requires a level of diligence far beyond that of the average traveler. Your biggest risk is not the condition itself, but the potential for an insurer to use it as a pretext to deny a claim for medical evacuation, citing a “non-disclosed pre-existing condition.” You must proactively manage this risk through meticulous documentation and transparent communication.
Industry bodies like the Adventure Travel Trade Association (ATTA) have developed health and safety guidelines, often with expert input from institutions like the Cleveland Clinic. While companies displaying an ATTA badge state they follow these guidelines, the association itself does not verify compliance. This puts the onus back on you. The guidelines rightly emphasize that even the best insurance policy has limitations, requiring careful review. Your job is to build an irrefutable paper trail that proves your condition was stable and that you were cleared for participation.
This isn’t just about getting a doctor’s note. It’s about a comprehensive documentation strategy designed to preemptively counter any potential objections from your insurer or the adventure provider. This strategy must be executed before your trip begins.
- Obtain a Specific Doctor’s Letter: Your doctor’s letter must state that your condition is currently “stable and controlled.” Vague statements are useless.
- Get Explicit Clearance: The letter must also specify that you are “fit to travel and participate in [the specific activity],” for example, “scuba diving to 30 meters” or “trekking to 4,000 meters.”
- Date the Letter Strategically: The letter must be dated shortly before your departure to be considered current. A letter from six months ago is irrelevant.
- Declare Formally to Your Insurer: Do not rely on a phone call. Formally declare your condition and the planned activity in writing to your insurance company and get their written confirmation of coverage.
- Inform the Adventure Provider: Send a written declaration of your condition and a copy of your doctor’s clearance to the adventure provider well before the trip. This prevents them from claiming they were unaware.
This chain of documentation makes it extremely difficult for an insurer to deny a claim based on your pre-existing condition. You have demonstrated full transparency and due diligence, shifting the liability away from yourself.
The Power Bank Mistake That Leaves You Stranded on a Hike
In the modern era of remote exploration, your smartphone is often your map, compass, and emergency beacon all in one. A dead battery is not an inconvenience; it’s a life-threatening emergency. The common mistake is assuming the advertised mAh (milliamp-hour) capacity of your power bank translates directly into a set number of charges. This oversimplification ignores two critical variables: energy loss during transfer and the devastating effect of temperature.
Firstly, no power bank is 100% efficient. A significant portion of energy is lost as heat during the charging process. A conservative rule of thumb is to expect only about 70% of the advertised capacity to be usable. Secondly, and more critically for hikers and climbers, battery chemistry performs poorly in the cold. In near-freezing conditions, extreme temperatures can slash battery capacity by over 50%. A power bank that provides two full charges at home might deliver less than half a charge at altitude, leaving you dangerously stranded.
Relying on your navigation device requires a rigorous approach to power management. You must calculate your true needs and implement strategies to conserve every milliamp. Assume the worst-case scenario and plan accordingly.
- Calculate True Charges: Use the formula: (Bank mAh × 0.7) ÷ Phone mAh = Realistic Charges. For example, a 10,000 mAh bank charging a 3,000 mAh phone is (10,000 x 0.7) / 3,000 = ~2.3 charges in ideal conditions.
- Insulate Your Power: In cold weather, keep your power bank and phone insulated in a wool sock or similar wrapping, stored in an inside pocket close to your body heat. Never leave it in an exposed pocket of your backpack.
- Optimize Your Device: Use your phone in airplane mode with pre-downloaded offline maps. The screen and cellular/GPS radio are the biggest power drains.
- Consider a Dedicated GPS: For multi-day or serious remote treks, a dedicated low-power GPS device is a more reliable primary navigation tool, saving your phone’s battery for emergency communication.
Treating your power bank as a piece of critical safety equipment, with the same attention to detail as your water supply or first-aid kit, is essential for self-sufficiency in the backcountry.
Key Takeaways
- A provider’s safety culture and systems are far more important than a simple license.
- Your personal physical preparation and hands-on equipment checks are non-negotiable parts of the safety equation.
- Scrutinize every contract, especially insurance policies, for hidden clauses that create unacceptable risk.
How to Get Scuba Certified Abroad Without Compromising Safety?
Getting scuba certified in a tropical paradise is a common travel dream, but it can also be a minefield of compromised standards. The temptation for “dive factories” in tourist hotspots is to prioritize volume and speed over proficiency, churning out certified divers who lack fundamental skills and confidence. While DEMA data shows U.S. scuba certifications have declined from their peak, the international market is booming, creating intense competition that can drive down quality. As a student, your goal isn’t just to get a C-card; it’s to build a foundation of skills that will keep you alive underwater.
This requires you to become an active, critical consumer of dive education. You must vet your instructor and the dive operation with the same rigor you would a surgeon. A good instructor is a mentor, not just a guide. They should be patient, thorough, and obsessed with safety and procedure. The quality of your first course will dictate your habits—good or bad—for your entire diving career. Don’t let the allure of a cheap or fast certification compromise your long-term safety.
Your Instructor Vetting Checklist: 5 Critical Questions
- Experience Level: “How many students have you personally certified?” (Look for a number in the hundreds, not dozens. This indicates significant teaching experience.)
- Class Size: “What is your maximum student-to-instructor ratio for this class, both in the pool and open water?” (A low ratio, like 4:1 or less, is a sign of quality.)
- Operational Transparency: “Can I see your dive shop’s air compressor and gas fill area?” (A clean, well-maintained, and organized area is a strong indicator of a professional operation.)
- Procedural Discipline: “Do you use written checklists for equipment setup and pre-dive safety checks?” (The answer should be an emphatic “yes.” Pros use checklists.)
- Emergency Preparedness: “What are your specific emergency procedures for a lost diver or a medical incident, and where is the nearest hyperbaric chamber?” (They should have a clear, rehearsed plan and know the answer immediately.)
Furthermore, understand that even within a single agency like PADI, not all courses are created equal. The level of required supervision can vary significantly, which is a critical detail. This highlights the need to understand the specifics of what you’re signing up for.
“PADI Advanced Open Water Diver course does not require direct instructor supervision during adventure dives, while the Dry Suit Diver course requires direct supervision, theory class, and confined water training.”
– Wikipedia, Professional Association of Diving Instructors
This difference is profound. It demonstrates that the “brand” of certification is less important than the specific standards of the course and the quality of the instructor teaching it. Your safety depends on your ability to discern this difference.
Your next adventure begins not with a booking, but with a rigorous assessment. Apply this inspector’s mindset to your next choice, and transform risk into a calculated, exhilarating experience.