In summary:
- Instead of avoiding crowds, develop a strategic eye to see and capture a building’s unique story.
- Use challenging conditions like midday light and restoration scaffolding as creative opportunities.
- Learn to “read” a building’s historical layers to create more meaningful photographs.
- Combine guided tours for access with solo walks for deeper, personal discovery.
- Adopt a responsible approach to protect fragile sites while creating your art.
You arrive at a magnificent cathedral, camera in hand, only to find a sea of selfie sticks obscuring the view. This is the shared frustration of every history buff and photography enthusiast: the most iconic architectural wonders are often the most overrun. The standard advice—go early, visit in the off-season—is well-known, but often impractical or simply not enough. These tips treat the crowd as an obstacle to be avoided, a problem that ruins the experience.
But what if the key wasn’t about finding an empty moment, but about changing your perspective entirely? What if you could train your eye to see through the noise, to engage with the building on a deeper level, and to create powerful images precisely because you’ve adopted a more strategic approach? The real art lies not in waiting for an empty scene, but in mastering the ability to isolate beauty, read history, and frame a unique narrative amidst the chaos. It’s about a choreographed gaze, a conscious decision to direct your focus and your lens.
This guide moves beyond the generic tips. It provides a strategic framework for the architectural photographer and history lover. We will explore how to command challenging light, decipher a building’s past, and find unique compositions that a million other tourists will miss. By shifting from a passive visitor to an active observer, you can transform a frustrating experience into a deeply rewarding artistic pursuit.
This article provides a complete roadmap for appreciating and capturing the soul of man-made wonders. The following sections will guide you through each strategic element, from mastering light to visiting fragile sites with respect.
Summary: A Strategic Guide to Architectural Photography
- Why Visiting at Noon Ruins Your Photos of Historic Facades?
- How to “Read” a Building’s History Through Its Construction Layers?
- Architecture Tour or Solo Walk: Which Reveals Hidden Details?
- The Restoration Disappointment: How to Check Scaffolding Status Before You Go?
- How to Frame Iconic Buildings Differently Than 1 Million Other Tourists?
- How to Beat the Heat and Crowds at Open-Air Archaeological Sites?
- How to Predict Cloud Cover Specifically for Mountain Views?
- How to Visit Fragile Historic Sites Responsibly and Safely?
Why Visiting at Noon Ruins Your Photos of Historic Facades?
Conventional wisdom dictates that photographers should avoid midday at all costs. The high, harsh sun is seen as a creative killer, flattening features and blowing out highlights. For the casual tourist, this is true. But for the strategic photographer, noon offers what can be called “analytical light.” Instead of fighting it, you can command it to reveal what the soft, forgiving light of dawn and dusk often conceals. This harsh light sculpts stone, creating deep, dramatic shadows that reveal the true texture and three-dimensional form of a building’s details.
The trick is to shift your focus from the grand facade to the intricate details. High-contrast light is an exceptional tool for documenting structural elements, emphasizing the geometry of carvings, and highlighting the material differences between original stonework and later repairs. It’s a light that doesn’t flatter; it reveals. To master this, you must learn to work with the shadows it creates, using them to add depth and drama to your compositions. An analysis of architectural photography techniques highlights that this approach turns a perceived disadvantage into a powerful narrative tool.
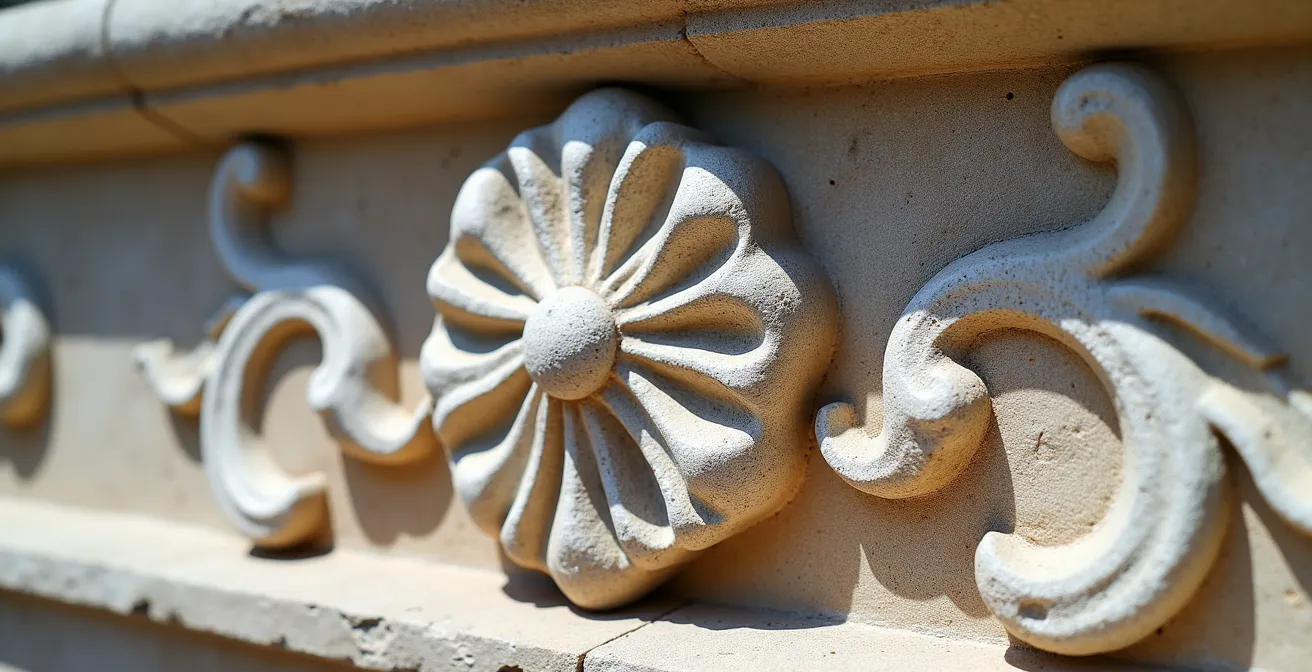
As this image demonstrates, the harshness of the sun can be an asset. The deep recesses become pools of black, while the raised surfaces are starkly defined. This allows you to create almost abstract compositions that celebrate the craftsmanship and the effects of time on the material. Consider these approaches to harness midday light:
- Shoot in RAW format to retain maximum detail in both the brightest highlights and deepest shadows.
- Position yourself to capture deep-cut geometric carvings where the sun creates dramatic relief patterns.
- Use the high contrast to emphasize texture differences between original stone and restoration patches.
- Look for interior opportunities where noon sun shines through windows, creating transient spotlight effects.
- Embrace the analytical light to document structural details that softer light would obscure.
How to “Read” a Building’s History Through Its Construction Layers?
An iconic building is rarely the product of a single vision or era. It is an architectural palimpsest—a canvas on which successive generations have written, erased, and rewritten their stories. Learning to read these layers transforms you from a mere sightseer into a historical detective. Every patched wall, filled-in window, and change in material tells a story of economic shifts, changing tastes, or the scars of conflict. The Roman Colosseum, for example, is not just a single structure but a masterclass in evolving engineering, combining different orders and materials to manage massive crowds and project imperial power.
Recognizing these visual clues requires a trained eye. A sudden change from ornate, hand-hewn stone to simpler, rougher blocks halfway up a wall might signal that the original patron ran out of funds during a plague or recession. Bricked-up windows on a European mansion might not be an aesthetic choice, but a direct consequence of 17th or 18th-century window taxes. These are the narratives hidden in plain sight, waiting to be discovered and photographed.
This table, based on common findings from studies of historical places worldwide, offers a starting point for deciphering these clues.
| Period | Visual Indicator | Historical Context |
|---|---|---|
| Medieval to Renaissance | Filled-in arched windows | Window taxes in 17th-18th century Europe |
| War Damage | Patched stonework with different color | WWII reconstruction efforts 1945-1960s |
| Economic Crisis | Sudden material change mid-wall | Funding loss during plagues or recessions |
| Modern Restoration | Machine-cut vs hand-hewn stone | 20th-21st century preservation projects |
By focusing your lens on these junctions—the seams between eras—your photography gains a profound narrative depth. You are no longer just capturing a pretty building; you are documenting a conversation across centuries. This is the difference between a postcard and a historical document.
Architecture Tour or Solo Walk: Which Reveals Hidden Details?
When faced with a complex historic site, the choice between a guided tour and a solo exploration presents a strategic dilemma. Each approach offers unique advantages for the photographer and historian. The official tour often provides access to restricted areas and delivers the foundational, sanctioned narrative of the site. It’s an efficient way to get your bearings and understand the key stories the institution wants to tell. However, these tours move at a fixed pace, often brushing past the subtle details that make for the most compelling photographs.
The solo walk, by contrast, offers the luxury of time and the freedom to pursue your own curiosity. It allows you to linger, to observe the play of light, and to discover the overlooked corners and textures that a group tour would ignore. This is where you can truly engage in a visual dialogue with the building, challenging the official story and forming your own interpretations. The ideal strategy is not to choose one over the other, but to combine them.
Consider a hybrid approach: take the official tour first to gain access and a baseline understanding. Then, immediately re-walk the route on your own. With the primary narrative in mind, you can now focus on the details that contradict or enrich it. To elevate your solo walk into a truly curated experience, prepare in advance:
- Research expert-level insights by downloading academic papers or architectural analyses about the site before you visit.
- Pre-load your phone with historian podcasts or video documentaries specific to the landmark to listen to on-site.
- Use apps like Google Arts & Culture to pull up high-resolution images of details or historical photos for context while you explore.
- After an official tour, retrace the path specifically to notice what the guide *didn’t* mention.
This two-step method gives you the best of both worlds: the access and structure of a tour, combined with the creative freedom and deep observation of a solo exploration. It turns a passive listening experience into an active investigation.
The Restoration Disappointment: How to Check Scaffolding Status Before You Go?
There are few things more deflating for an architectural photographer than arriving at an iconic landmark to find its famous facade entombed in a web of scaffolding. The “money shot” is gone. This is the restoration disappointment, a common hazard of visiting historic places. While it’s a necessary part of preservation, it can feel like a wasted trip. However, with a strategic mindset, even this setback can be turned into a unique creative opportunity.
First, a proactive approach can help you avoid complete surprise. Before your trip, become a digital detective. Check recent geotagged photos on social media platforms like Instagram or search for the landmark on live webcam aggregators. Official websites of major monuments sometimes post notices about long-term restoration work. Forums for travelers or photographers can also be invaluable sources of real-time information. While crowd-monitoring apps are common, applying the same principle to check for recent visitor photos is a smart way to gauge the visual state of a site.
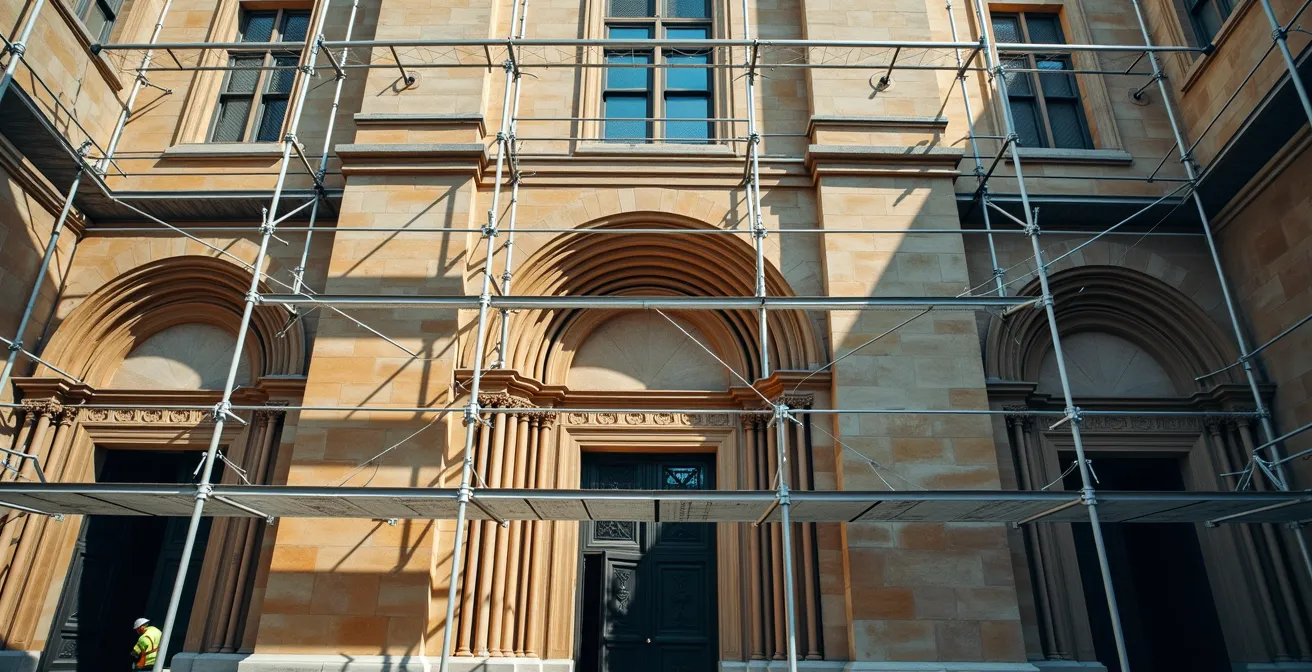
If you do arrive to find scaffolding, don’t put your camera away. Instead, reframe the subject. The scaffolding itself can become the focus—a modern, geometric exoskeleton contrasting with the organic, aged stone beneath. This juxtaposition tells a contemporary story about preservation, life, and the ongoing history of the building. Focus on the patterns, the play of light through the metal grid, and the human element of the restoration workers. You won’t get the classic postcard shot, but you might capture something far more original and timely: a building in a state of transformation.
This approach requires you to abandon your preconceived image and respond to the reality in front of you. It’s a test of your creative flexibility, turning a moment of disappointment into a chance to document a fleeting, unique phase in the landmark’s long life.
How to Frame Iconic Buildings Differently Than 1 Million Other Tourists?
Capturing a unique image of an over-photographed landmark is the ultimate challenge. The key is to consciously reject the designated “photo spots” where everyone else is standing and to employ techniques that alter the viewer’s perception of time and space. This is where your artistic strategy truly comes into play. It’s not just about what you see, but *how* you choose to see it.
One of the most effective strategies is to manipulate time. While golden hour is popular, the elusive “blue hour”—the brief period just before sunrise or after sunset—offers a magical, cool-toned light that can transform a scene. The sky takes on a deep, saturated blue, and city lights begin to glow, creating a serene and ethereal mood. According to photographic studies, the blue hour lasts only 20-40 minutes, making it a narrow but highly rewarding window for capturing unique shots. Another technique is using long exposures with a neutral density (ND) filter. This can blur moving crowds into a ghostly mist or smooth water into a silky, reflective surface, isolating the static permanence of the architecture.
Beyond manipulating light and time, you must also radically change your composition. Instead of capturing the whole building, focus on an abstract detail: the reflection of the sky in a single pane of glass, the worn texture of a few stone steps, or the rhythmic pattern of a bay of windows. By deconstructing the landmark into its essential geometric or textural components, you create a new way of seeing it. Consider these creative techniques to build a unique portfolio:
- Use neutral density filters for long exposures to blur crowds into a mystical fog, keeping the building tack-sharp.
- Focus on abstract details like a single column, a worn doorknob, or reflections on a small section of the facade.
- Create a temporal triptych by shooting the exact same angle at dawn, noon, and dusk, then presenting the three images together.
- Photograph people experiencing the landmark, making their awe or interaction the primary subject.
- Find alternative vantage points from nearby rooftops, across a river, or down less-traveled side streets.
How to Beat the Heat and Crowds at Open-Air Archaeological Sites?
Open-air archaeological sites like Pompeii, Chichén Itzá, or the Roman Forum present a dual challenge: intense sun and overwhelming crowds. The sheer scale and lack of shelter can quickly lead to exhaustion and frustration. While the classic advice to arrive at opening time is sound—as seen at Chichén Itzá, where an early start beats both heat and tour buses—a more nuanced strategy is required for a truly productive visit.
The most effective approach is a “shadow-path strategy.” This involves planning your route through the site not by the map’s points of interest, but by the movement of the sun and shadows. Before you even arrive, use an app like SunCalc or PhotoPills to visualize how shadows will be cast by ancient walls, columns, and natural terrain at different times of the day. This allows you to choreograph a visit that keeps you in the shade during the hottest hours, preserving your energy for creative photography.
This strategy can be combined with the “reverse itinerary” tactic. Most visitors follow a predictable, linear path from the entrance to the main attraction and back. By deliberately walking this route backward, you will consistently be moving against the main flow of traffic, encountering far fewer people at each point of interest. This gives you precious, uncrowded moments to compose your shots. A complete shadow-path strategy might look like this:
- Start with the most exposed, highest-elevation areas at dawn when temperatures are coolest and the light is best.
- As the sun climbs, plan your route to follow the shade cast by large structures or natural ridges.
- Save partially sheltered areas, such as tombs, covered porticos, or any on-site museums, for the midday heat.
- Implement the “reverse itinerary” by starting at what is typically the end of the tour and working your way back to the entrance.
By thinking of the site as a dynamic environment of light and shadow rather than a static map, you can outsmart both the sun and the crowds, ensuring a more comfortable and photographically successful experience.
Key Takeaways
- True architectural appreciation goes beyond avoiding crowds; it involves developing a strategic eye for light, history, and composition.
- Challenging conditions, such as midday sun or scaffolding, are not obstacles but unique creative opportunities for the prepared photographer.
- A hybrid approach, combining research, guided access, and solo exploration, yields the deepest understanding and most original photographs.
How to Predict Cloud Cover Specifically for Mountain Views?
Photographing architecture in a mountain setting—be it a remote monastery or a modern chalet—introduces a powerful and unpredictable variable: the weather. Clouds can make or break a shot, either obscuring a view entirely or adding immense drama to the scene. Predicting their behavior is crucial. Standard weather apps are often inadequate, as mountain weather is a microclimate system of its own. For targeted predictions, you need to use specialized tools favored by landscape photographers and meteorologists.
Your goal is often to predict the “cloud base,” or the altitude at which clouds will form. If your subject is a mountaintop structure, you want to know if it will be shrouded in fog, sitting just below a dramatic cloud ceiling, or rising above a sea of clouds (a cloud inversion). Tools like Windy.com offer detailed charts showing predicted cloud base altitude, allowing you to cross-reference it with the elevation of your location. This helps you anticipate whether you’ll be shooting in, under, or above the clouds.
Furthermore, the interplay of light and mountains is unique. The “golden hour” can be significantly affected by altitude and latitude. For instance, at high latitudes, the golden hour can last for several hours or even the entire day in certain seasons, as the sun never rises high in the sky. Planning for this requires a different sense of timing. This table outlines some of the best tools for mountain-specific weather planning, which, according to a calculator for photographic light, are essential for precision.
| Tool | Key Feature | Best Use Case |
|---|---|---|
| Windy.com | Cloud base altitude charts | Predicting if peaks will be above/below clouds |
| Meteoblue | Mountain-specific forecasts | Multi-day planning with precipitation probability |
| PhotoPills | Sun position calculator | Planning exact timing for mountain light |
| Local Webcams | Real-time conditions | Minute-by-minute ground truth verification |
By layering the data from these different sources, you move from hoping for good weather to strategically positioning yourself for it. This predictive power is what separates a lucky snapshot from a masterfully planned architectural landscape photograph.
How to Visit Fragile Historic Sites Responsibly and Safely?
As photographers and history lovers, we are drawn to the world’s most fragile and beautiful places. Yet our very presence can contribute to their decline. The responsibility that comes with this access is immense. As one guide notes when discussing the famous Petra Archaeological Park:
Petra Archaeological Park was declared a UNESCO World Heritage site in 1985, and in 2007 was named one of the New Seven Wonders of the World. Today, millions of tourists hike through the rugged mountains and deep canyons of southwestern Jordan to see this ancient architectural wonder.
– Wandering Carol, The 30 Best Historical Places in the World to Visit
When millions of people visit such a site, even small, seemingly harmless actions accumulate into significant damage. A tripod leg placed on a 2,000-year-old mosaic, the oils from a hand touching a delicate fresco—these actions slowly erase the very history we came to admire. True appreciation, therefore, must be expressed through mindful, responsible behavior. The goal is to create an “invisible footprint,” leaving the site not just as we found it, but perhaps even contributing to its preservation.
This means more than just following the rules. It means understanding the *why* behind them. Staying on designated paths isn’t just about personal safety; it’s about protecting unexcavated archaeology just beneath the surface. Not using a flash isn’t just a courtesy; it’s to prevent the cumulative fading of ancient pigments. By adopting this mindset, your visit becomes an act of stewardship. You are not just a consumer of history, but a guardian of it for future generations.
Action Plan: Creating an Invisible Footprint at Historic Sites
- Assess Points of Contact: Identify every interaction with the site, from where you walk to where you place your gear. Are you on a path or on fragile ground?
- Inventory Your Impact: Be aware of your equipment. Avoid placing tripod legs on ancient mosaic floors or delicate surfaces. Never let your camera bag scrape against a wall.
- Check for Coherence: Does your desire for a photo conflict with preservation rules? Always prioritize the site’s integrity over your shot. Stay on designated paths to protect both the archaeology and yourself.
- Evaluate Your Contribution: Instead of just taking, give back. Contribute to digital preservation by taking well-lit, geotagged photos and sharing them with archival projects. Never touch frescoes or painted surfaces, as oils from hands cause permanent damage.
- Plan for Sustainable Support: Buy tickets directly from official sources where proceeds are more likely to fund conservation efforts, rather than from third-party resellers.
Ultimately, a successful visit to an architectural landmark is not measured by the absence of crowds, but by the depth of your engagement. By applying these strategies, you shift from being a passive tourist to an active, thoughtful observer, capable of creating compelling art while honoring the history you are there to witness.